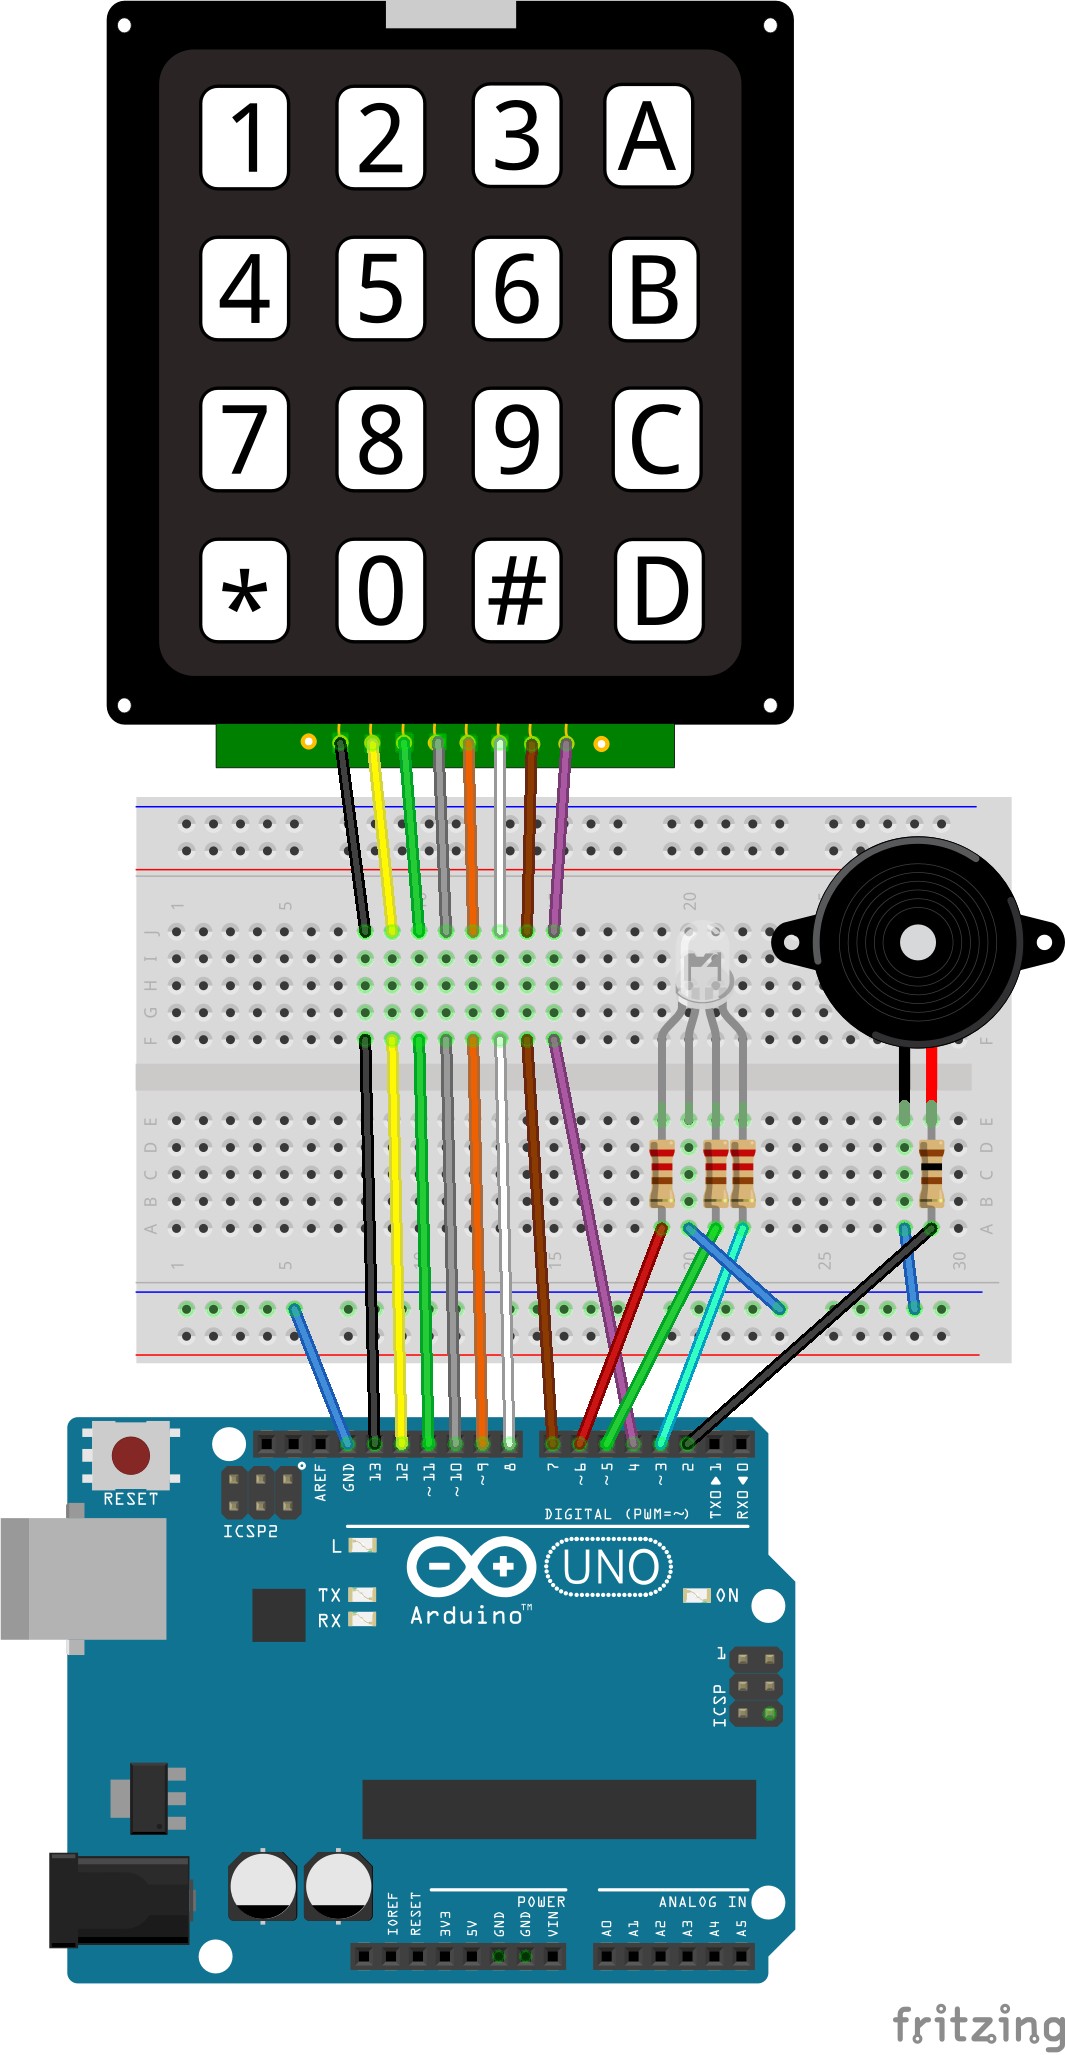
4×4 keypad Arduino Unolle. Jos koodin syöttää oikein, RGB LED palaa vihreänä. Jos taas koodin syöttää väärin, RGB LED palaa punaisena ja summeri soi puolen sekunnin ajan.
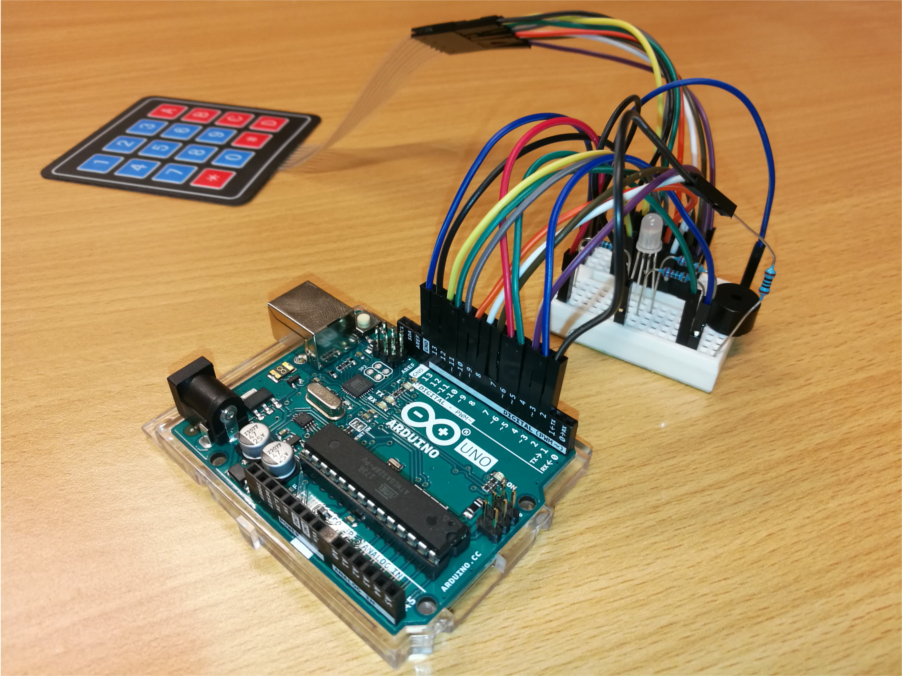
RGB LED:in kolme digital out jalkaa on kytketty 220 ohm:n etuvastuksiin. Passiivisen summerin digital out taas on kytketty 100 ohm:n etuvastukseen.
Lähdekoodi:
Esimerkkikoodi löytyy GitHubista: https://github.com/PyhaMarkus/arduino-keypad
// Include libraries
#include <Keypad.h>

// Constants are read-only and do not change. Row and column count is defined here. 4x4 for my keypad.
const byte ROWS = 4;
const byte COLS = 4;

// Buzzer pin number is defined here.
const int buzzerPin = 2;

// LED Pin numbers are defined here.
const byte redLEDPin= 6;
const byte greenLEDPin = 5;
const byte blueLEDPin = 3;

// Variable for button state. This will change.
byte buttonState = 0; // button status

// Password length. 4 characters + null = a total of 5.
#define Password_Length 5

char Data[Password_Length];
char pass[Password_Length] = "9694"; // Password is defined here.
byte data_count = 0;
bool Pass_is_good;
char customKey;

// Button layout. Characters here, match the layout of the keypad.
char hexaKeys[ROWS][COLS] = {
{'1', '2', '3', 'A'},
{'4', '5', '6', 'B'},
{'7', '8', '9', 'C'},
{'*', '0', '#', 'D'}
};

// Pin numbers for keypad.
byte rowPins[ROWS] = {13, 12, 11, 10};
byte colPins[COLS] = {9, 8, 7, 4};

Keypad customKeypad = Keypad(makeKeymap(hexaKeys), rowPins, colPins, ROWS, COLS);


// ---------------------- setup ---------------------------

void setup() {

// Data rate for serial data transmission. 9600 bits per second.
Serial.begin(9600);

// Initialize RGB LED pins as output
pinMode(redLEDPin, OUTPUT);
pinMode(greenLEDPin, OUTPUT);
pinMode(blueLEDPin, OUTPUT);
pinMode(buzzerPin, OUTPUT);
}

// ------------------ loop starts here ---------------------

void loop(){

customKey = customKeypad.getKey();

// If a key is pressed,
if (customKey){
// Add that key's value to data_count
Data[data_count] = customKey;
// Print the current data_count string to serial
Serial.print(Data[data_count]);
data_count++;
}

// If the keypad has been pressed 4 times, then run the next if-statement
if(data_count == Password_Length-1){

// If Data and pass strings are equal, then !strcmp returns a 1, which = TRUE, then...
if(!strcmp(Data, pass)){

Serial.println(); Serial.println("Correct password"); // Print line to serial
setColor(0, 255, 0); // Set the RGB LED to green
delay(3000); // Wait 3 seconds
setColor(0, 0, 0); // Set the RGB LED off
}

else {
Serial.println(); Serial.println("Wrong password"); // Print line to serial
setColor(255, 0, 0); // Set the RGB LED to red
tone(buzzerPin, 1000, 500); // Buzz the buzzer for 500 milliseconds in the frequency of 1000.
delay(2000); // Wait for 2 seconds
setColor(0, 0, 0); // Set the RGB LED off
}

clearData(); // Clear data from serial
}
}

//---------------------- loop ends here ----------------------

void clearData(){
while(data_count !=0){ // While data_count is not equal to 0
Data[data_count--] = 0; // Set data_count length to 0.
}
return;
}

// Brightness of the LEDs or the duty cycle of the PWM signal created by analowWrite() function. Values can vary from 0 to 255. 255 for maximum brightness.
void setColor(int redLEDValue, int greenLEDValue, int blueLEDValue) {
analogWrite(redLEDPin, redLEDValue);
analogWrite(greenLEDPin, greenLEDValue);
analogWrite(blueLEDPin, blueLEDValue);
}
Käytetyt osat:
| Kappalemäärä | Osan nimi |
|---|---|
| 1 | Arduino Uno Rev3 |
| 1 | 4x4 Keypad |
| 1 | Passive Buzzer |
| 1 | RGB LED |
| 1 | 100 ohm Resistor |
| 3 | 220 ohm Resistor |
| 1 | Small Breadboard |
| A lot | Jumper Wire |
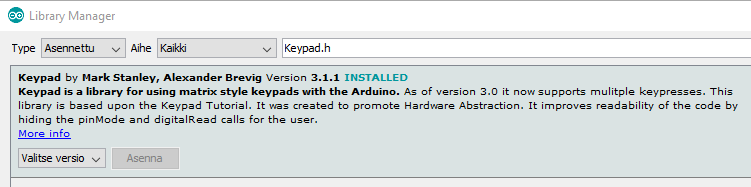
Käytetyt kirjastot:
- Keypad.h
Käytetyt lähteet:
http://www.circuitbasics.com/how-to-set-up-a-keypad-on-an-arduino/